GETTING STARTED WITH GLOBUS CONNECT video
Below are the steps, with example screenshots, to setup and use your Globus account, and to access the UNC Globus Collection named “UNC, Research Computing, DataMover” (or uncch#unc-rc-dm). The last section is the optional creation of a Globus personal endpoint by installation and configuration of the Globus Connect Personal software.
Globus addresses deficiencies in secure copy requests by automating large data transfers, resuming interrupted transfers, encrypting data being transfered, and simplifying the implementation of high-performance transfers between computing centers. The setup described below only needs to be done once. For further detail about using Globus to transfer data, see Globus Connect file transfer.
Table of Contents
Globus Connect Web Interface setup and configuration
- “UNC, Research Computing, DataMover” Collection
- Destination of transfer
- Initiate transfer
- Further information
Globus Connect Web Interface Setup and Configuration
Go to https://www.globus.org and click the "Log in" button at the top right. All of the following steps are on this web site.
The login method allows you to login using your UNC Onyen by selecting "University of North Carolina at Chapel Hill" as the Identity Provider:
- Enter “chapel hill” and click on “University of North Carolina at Chapel Hill”
- Click the “Continue” button

UNC-CH as Identity Provider
- On the CILogon web page, verify “University of North Carolina at Chapel Hill” is the Identify Provider.
- Check the box “Remember this selection”
- Click on “Log On”
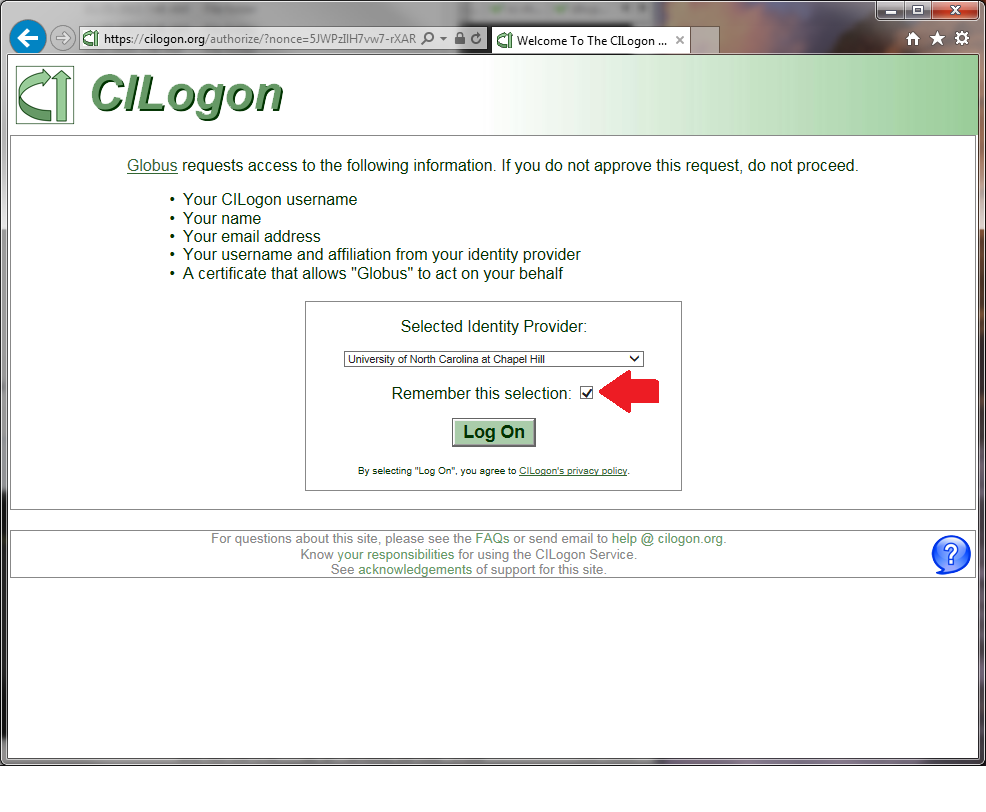
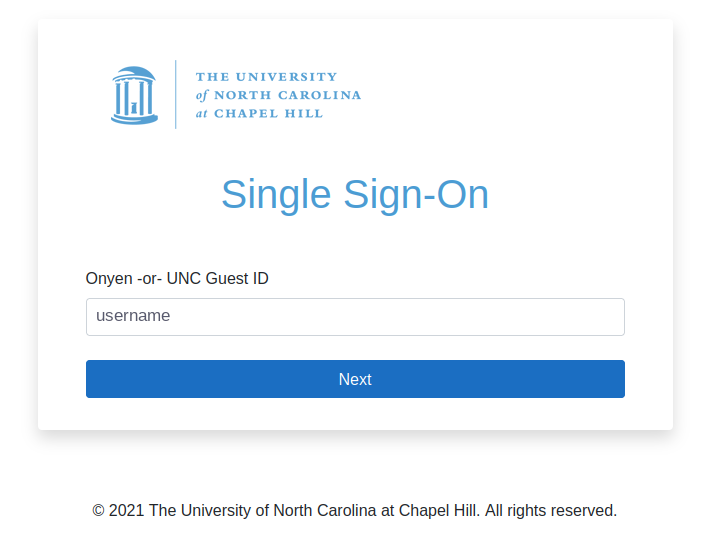
Login with UNC Onyen
- Enter your UNC Onyen ID/name and password using the standard UNC Single Sign-On process. Enter your Onyen ID/name and click "Next":
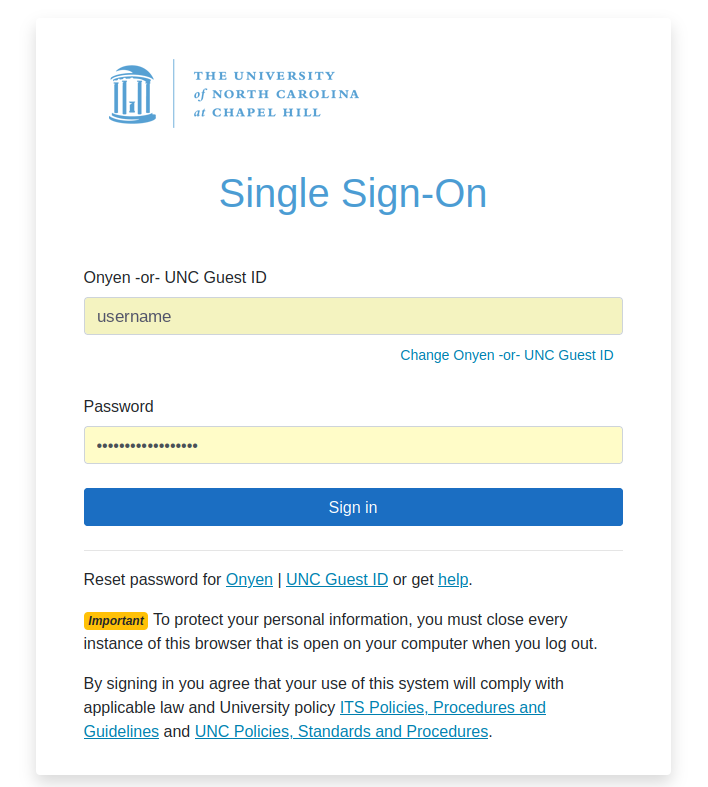
- Then enter your password and click "Sign in":
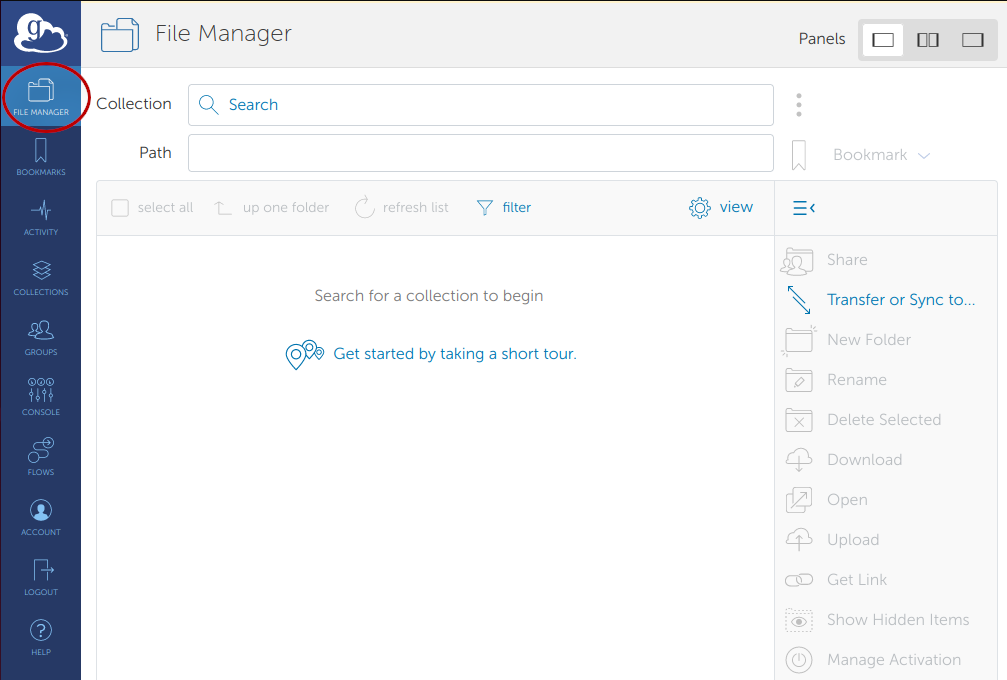
Transfer Files
- After logging in, you should be on the “File Manager” page. You can return here at any time by the "File Manager" link near the top of the left-hand menu.
“UNC, Research Computing, DataMover” Collection
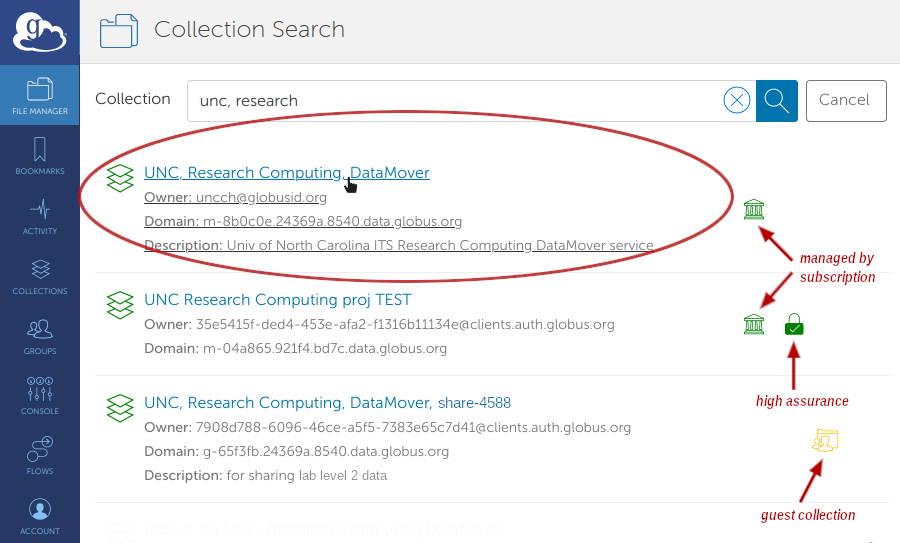
- To access the UNC Collection, start typing “UNC, Research Computing, DataMover” in the ‘Collection’ field, and when the collection appears in the results, click on it. (In the search results, icons to the right of the collections show information about the type and features of a collection, as indicated in the image below.)
Destination of transfer
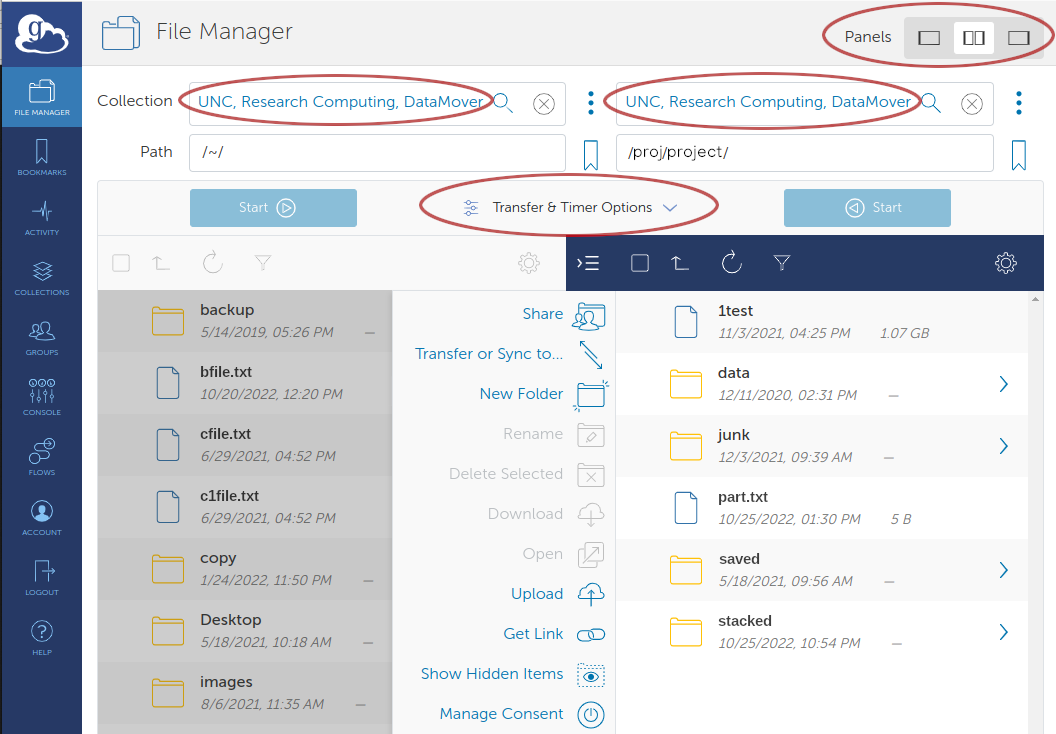
In the top-right corner, select the double-panel view (the middle of the three icons in the image below). This keeps the collection just selected on the left, and adds another panel to select a collection on the right.
Next, select the destination collection for the transfer. It can be:
- A personal collection to transfer between your personal workstation/laptop and Research Computing storage. To setup your personal collection, see steps further below in Globus Connect Personal.
- The “UNC, Research Computing, DataMover” collection again (so this collection is both the source and destination) to transfer data internally between various Research Computing storage areas such as Scratch Space and Mass Storage (~/ms/).
- Any other Globus collection at UNC or another institution.
Initiate transfer
It is possible to navigate through both collections by double-clicking a directory to enter it and clicking the “up one folder” button (or up-arrow icon) at the top to go to the parent directory. Either files or directories may be selected as items to transfer.
- In the source collection, find the item(s) to transfer and single-click it/them to select.
- In the destination collection, single-click the directory into which the data should be copied.
- By default, transfers copy files from one collection to the other, overwriting existing files if they are already present at the destination. If any non-default transfer options are needed, the “Transfer & Sync Options” dropdown menu at the center of the page (between the two Start buttons) offers options to customize the behavior of a transfer. If needed, expand this menu, select required options, then collapse the menu.
- To initiate transfer, confirm that correct locations in the source and destination are selected and click the Start button on the source side.
Further information
- For further details about transferring data using Globus, please see Globus Connect file transfer.
- To share data with internal or external collaborators using Globus, please see Sharing Files with Collaborators Using Globus.
Globus Connect Personal
Globus Connect Personal (GCP) installations older than GCP 3.2.0 need updated to GCP 3.2.0 by December 12, 2022 to keep functioning. Update instructions: Globus Transfer Service Certificate Authority Update - Globus Connect Personal
Please contact research@unc.edu with any questions or if you need assistance.
Setting up a personal collection by installing and configuring the Globus Connect Personal software
It is only necessary to set up a personal collection on your workstation/laptop if you will be transferring data between it and other Globus collections (such as ‘UNC, Research Computing, DataMover‘ or collections of other institutions).
Creating a personal collection
If you need to set up a personal collection on your PC, that is done by installing and configuring the Globus Connect Personal (GCP) software on it. To obtain this software, go to https://www.globus.org and:
- Log in using the SSO and onyen log in process described above.
- Click on "Collections" in the left side navigation panel.
- Click on "Get Globus Connect Personal" link in the top right.
- Download and install the Globus Connect Personal (GCP) app that corresponds to the OS of your computer.
- Start up the GCP app on your computer and follow the setup instructions to finish the set up. Be sure to choose a meaningful collection name for your personal collection.
- You should now see that collection listed under "Your Collections" in https://app.globus.org/file-manager/collections.
Further configuration
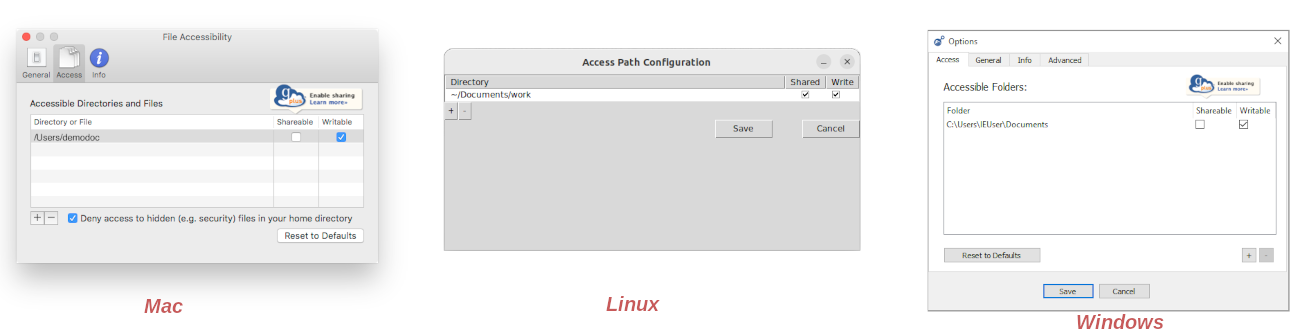
After creating a personal collection, sometimes further configuration is needed, such as setting which paths on your PC are made accessible in the collection and permissions for those paths. The GCP software for each operating system has a Preferences window where this can be set up:
- On Mac, from the Globus icon in the menu of running applications, select "Preferences..." → "Access".
- On Linux, from the main GCP window, select "File" → "Preferences".
- On Windows, right-click the Globus icon in the status bar at the bottom of the screen, then select "Options..." → "Access".
The access path configuration window looks something like this for each operating system:
Personal collection status
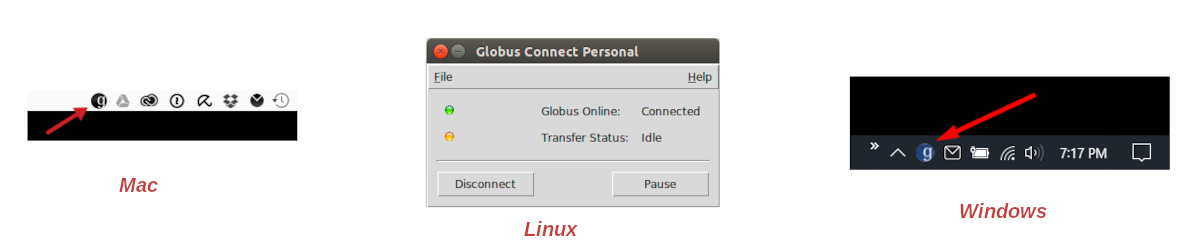
To use a personal collection as the source or destination of a transfer, the GCP software must be running and have a status of "Connected". Depending on how GCP is configured, it may automatically start and/or connect when the operating system starts. You can check the status, and change it ("Connect" or "Disconnect"), by:
- On Mac, click the Globus icon in the menu of running apps at the top of the screen.
- On Linux, the main Globus window shows the status of Connected or Disconnected and a button to toggle this status.
- On Windows, click the Globus icon in the menu of running apps at the bottom of the screen.
Globus Group Membership
Premium Globus features such as creating more than one Globus Flow, sharing from a GCP collection, and performing GCP to GCP transfer, are available through membership in a Globus subscription group. To request access, go to the Groups page in the left menu, select the required group (either University Of North Carolina at Chapel Hill or University Of North Carolina at Chapel Hill (HA), choose the HA group for working with HA collections), and select the button on the right to request to join the group.
(Premium Globus features were previously available through membership in a Globus Plus group.)
Downloads for Windows, Mac, Linux
Installation instructions and download links: Globus Connect Personal