Using Longleaf OnDemand Visual Studio Code (VS Code) App
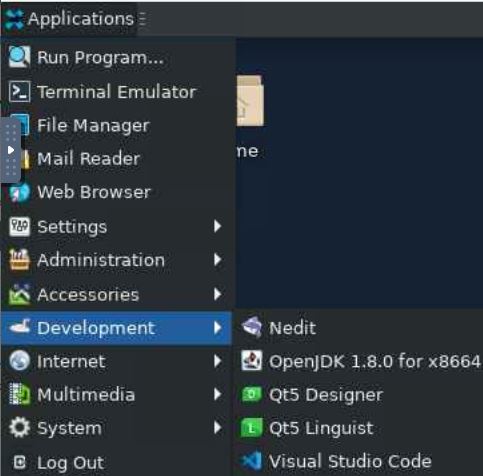
The best way to use Visual Studio Code (VS Code) and longleaf is through longleaf's Open On Demand (also called onDemand or OOD). Once you log into OOD, start an interactive session for Longleaf Desktop (or Longleaf Desktop with GPU, if you need a GPU). Once the job starts running and you have launched it, select Applications in the upper left, then Development in the drop down menu and Visual Studio Code:
If using OnDemand's VS Code will not work for what you need to do, please send email to research@unc.edu and let us know what your needs are outside of what OnDemand can provide. We will add your requirements to the enhancement request list for OnDemand.
Using Locally Installed Visual Studio Code (VS Code) App to Connect to Longleaf
The remaining sections of this document will go through how to use an installation of Visual Studio Code (VS Code) on your desktop/laptop to do remote development and execute code on Research Computing’s Longleaf cluster. We assume you already have a Longleaf account, and Visual Studio Code as well as an OpenSSH compatible SSH client installed locally.
To use VS Code with longleaf, you will need to manage and use two different types of connections with longleaf. The first one you will need is a connection to longleaf.unc.edu, which is longleaf's login node. This is where you can do based file editing, file manipulations and quick tests, but not where your extecute your computationally-intensive commands, nor use cpptools. Long computations need to be executed on a compute node. Cpptools has an issue that causes unexplainably high cpu surges. Tying up the login node with an intensive command can result in degradation of access & performance to the longleaf login node for other users and is an abuse of your longleaf privileges. Connecting to a compute node via VS Code requires you to submit a job to SLURM to request a compute node (more about that later).
In the first section we will connect to a Longleaf login node from VS Code and then in the second section we will show how to connect to a Longleaf compute node from VS Code. These two sections are for users who intend to use both. Experienced VS Code users who intend to only use a compute node connection can skip to the discussion in Section 3.
Section 1: Connecting to a Longleaf login node
Step 1: Install the Remote-SSH extension
First you will need to install the Visual Studio Code Remote - SSH extension**.**In the VS Code menu, go to
View -> Extensions

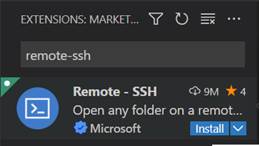
In the Marketplace search box, search for the term “remote-ssh” and select the Install button on the search result.
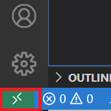
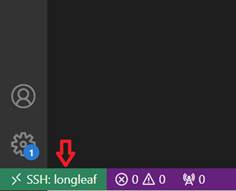
Upon successful installation of the Remote-SSH extension you should see a new Remote icon the bottom left corner of VS Code.

Step 2: Setup SSH
The recommended approach for authenticating via VS Code is by SSH key pair. Otherwise, you’ll be prompted to enter your Longleaf credentials for every single operation you do on Longleaf via VS Code. To set up the SSH key pair open a bash shell (on Windows we recommend using PowerShell, on MacOS we recommend using the Terminal application) on your local machine and run the following command:
ssh-keygen -t rsa -b 2048
Creating a passphrase is optional and you can leave that blank.
If you have other ssh key files you want to keep separate, choose a name other than the default. If you do not,press Enter to save the key in default location. The rest of this document uses the default name.

After the command executes you will see a key’s random art image. You will now have a key pair (two new files) under your local ~/.ssh directory. In this case the two new files will be called id_rsa and id_rsa.pub.
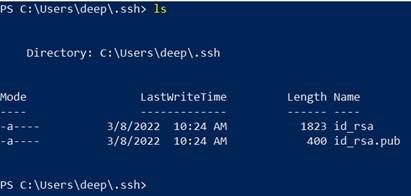
The former is the private key and the latter is the public key. DO NOT SHARE YOUR PRIVATE KEY WITH ANYONE.
The final step is to upload the public key (the contents of id_rsa.pub) to Longleaf. Type cat id_rsa.pub to display the contents. Then log into longleaf.unc.edu with an ssh session and then go into your ~/.ssh folder on Longleaf:
cd ~/.ssh
Check to see if there is a file called authorized_keys:
ls -al
If there isn’t, create one using the UNIX touch command:
touch authorized_keys
Open the authorized_keys file with your favorite linux editor and copy and paste the contents of your local id_rsa.pub file (from the previous step) into the authorized_keys file. You can have multiple key entries in a single authorized_keys file.If you already have an authorized_keys file append the contents of your local id_rsa.pub file to the end. Make sure each key in the authorized_keys file is on its own line and there are no line breaks within a key entry. Save and exit authorized_keys.
Step 3: Connect to Longleaf from VS Code using Remote - SSH
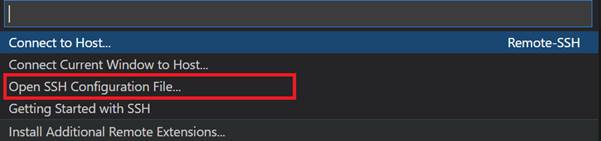
In VS Code, click on the Remote icon in the bottom left corner to bring up a menu of the Remote extension commands:
Click on Open SSH Configuration File…
If you do not see it listed as an option, you will need to expand your list: On Windows, type Cntl+Shift+P. MacOS users can try selecting Connect to Host..., Configure SSH Hosts....
The next step is to update your local ssh configuration file with a Longleaf entry . When prompted to choose a SSH configuration file select the one under your home folder (e.g., ~/.ssh/config on Linux, C:\Users\onyen.ssh\config on Windows, etc.). Enter the relevant server information for Longleaf:

For User put your ONYEN where it says onyen. For IdentityFile put the path to the local private key you created in step 2 above. If your VS Code ssh configuration file has existing entries append the one for Longleaf to the end.
Save your ~/.ssh/config file (Save is in the upper right,under the File menu in VS Code).
Next, click on the Remote icon in the bottom left corner and choose Connect to Host…
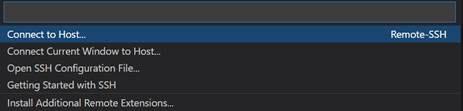
Select longleaf.

If prompted to select the Longleaf platform, select Linux.

When promptedwhether or not to continue select Continue.

In a new editor window, you’ll see your VS Code session on Longleaf.
You can now access any code files you have on Longleaf within your VS Code Longleaf session and work with the code as you normally would in VS Code.
Be aware, if you execute any code using this VS Code Longleaf session, it will run on the Longleaf login node that your VS Code session is connected to. For this reason, you will want to restrict yourself to basic editing and running only simple codes in this kind of VS Code session. Use the compute node section below to run your calculations using VS Code.
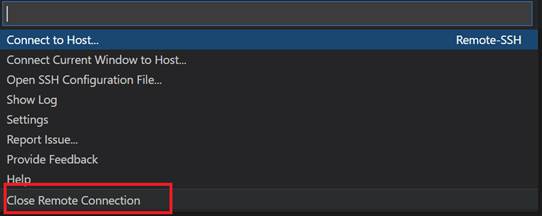
When you are finished, don't forget to log off of longleaf: Click on the Longleaf Remote icon in the bottom left corner and choose Close Remote Connection.
Section 2: Connecting to a Longleaf compute node
This section requires completion of the steps in Section 1.
Step 1: Update SSH config
You will need to update your local ssh config file. In VS Code, click on the Remote icon in the bottom left corner to bring up a menu of Remote extension commands:

. Click on Open SSH Configuration File…

When prompted to select a SSH configuration file choose the one under your home folder (e.g., ~/.ssh/config on Linux, C:\Users\onyen.ssh\config on Windows, etc.). This should open the same config file from Step 3 in Section 1. Modify the file to look like the following:
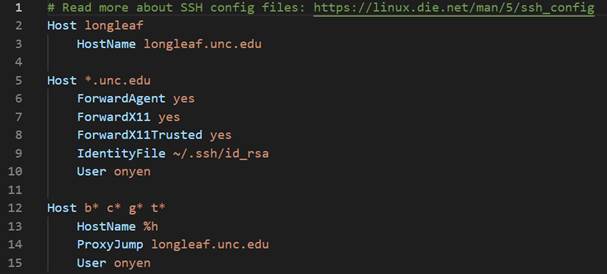
Here is the same text in a format you can copy'n'paste:
Host longleaf
    HostName longleaf.unc.edu

Host *.unc.edu
    ForwardAgent yes
    ForwardX11 yes
    ForwardX11Trusted yes
    IdentityFile ~/.ssh/id_rsa
    User onyen

Host b* c* g* t*
    HostName %h
    ProxyJump longleaf.unc.edu
    User onyen
For User put your ONYEN. For IdentityFile put the path to the local private key you created earlier.
Note: If VS Code prompts you for a password in the steps below, copy the IdentityFile and User lines in the Host section and repeat under the Host longleaf section.
Save your ~/.ssh/config file (Save is in the upper right,under the File menu in VS Code).
Step 2: Connect to a Longleaf compute node from VS Code using Remote - SSH
You will need to connect to Longleaf (login node) from VS Code.
Click on the Remote icon in the bottom left corner and choose Connect to Host… then select longleaf.
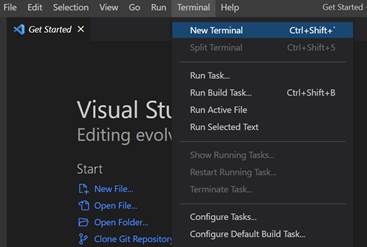
Once the Longleaf VS Code session appears, select Terminal from the upper menu. If you do not see it, click on the ... to the left of File in the upper left.
Choose New Terminal from the pull-down menu.
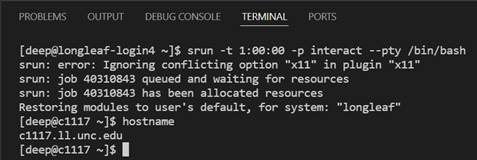
A Longleaf bash terminal session appear at the bottom of the VS Code window. In this terminal, submit a SLURM job for an interactive bash session with the time and memory your job will need. For example:
srun -t 1:00:00 -p interact -N 1 --pty /bin/bash

The above srun command opens bash session for one hour with the default resource limits (1 core, 2 Gb RAM). Modify the command as necessary to meet your needs.
Once your SLURM bash session is ready you will see a new bash shell on the compute node (in this case the compute node is c117).
Type hostname to see the hostname of the compute node your session is running on. Here, the hostname is c1117.ll.unc.edu. You will need this hostname later.
In this current Longleaf VS Code window choose Help from the upper menu and then choose Show All Commands from the pull-down menu. [Note: You must do this from this same Longleaf VS Code window: You will get the error message Could not establish conection to... if you try it from a VS Code window that is not connected to longleaf.]
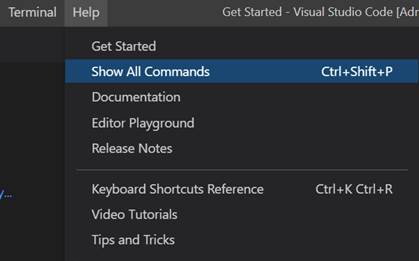
In the search box type “Remote-SSH” and choose Remote-SSH: Connect to Host…

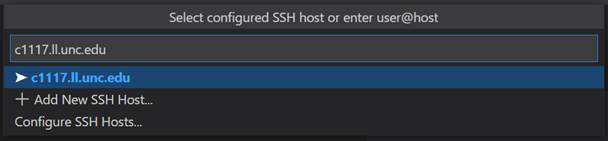
In the box, type in the host name of the Longleaf compute node your SLURM bash session is running on (in this case c1117.ll.unc.edu). You should be able to see it in the VS Code Window.
If you get a message about wrong authentication, check your ssh configuration file for longleaf node for: PreferredAuthentications=publickey. If you have it, remove it.
If prompted to choose the platform, select Linux.

When asked whether you want to continue to trust that the key represents the remote server, select Continue.

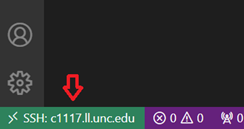
In a new editor window, you will see your VS Code session on the Longleaf compute node.
At this point you can access any code files you have on Longleaf from within your VS Code session and work with the code as your normally would in VS Code. Furthermore, since any code you run using this VS Code session will run on a Longleaf compute node, it’s possible to run computationally intensive codes. Note: If you close the remote connection to the login node, it will automatically close this remote connection to the compute node.
When you are finished, click on the Longleaf Remote icon in the bottom left corner and choose Close Remote Connection. Note: If you close the remote connection to the login node, it will automatically close this remote connection to the compute node.
Section 3: Disucssion: Connecting VS Code to a Longleaf compute node only (no login node)
If you already have an interactive job running (that you started outside VS Code in an ssh session), then you can skip logging into the login node in VS Code and go straight to opening a new SSH connection to that compute node's hostname. Note that exiting the interactive session (from the ssh session that submitted srun to create the interactive session on longleaf) will also kill the VS Code connection to the compute node).

We would like to thank Joey Richardson in UNC’s Biomedical Engineering department for his help figuring out the steps in this section.